Guides · 2026-10-03
Why Pixel Art Goes Blurry When You Place It in Photoshop
You drag a 22×17 button sprite into your Photoshop document and it arrives soft: the edges smeared, new in-between colours that you never drew. Open the same PNG on its own and it's perfectly sharp. On Adobe Community the thread "Why are pixels blurring only when I place my image?" asks exactly this.
Nothing is wrong with the file. Photoshop resampled it on the way in: it computed new pixels at a different size or position, and the default method smooths them. Here's why it happens, how to see which cause you have, and how to get your pixels in untouched.
First, check it isn't just the zoom
At zoom levels like 33%, 50% or 66.7%, Photoshop draws a smoothed preview: the pixels are fine, the screen isn't. Press Ctrl+1 (Cmd+1) for 100%, or zoom to 200%, 400%, 800%. If it's sharp there, there's nothing to fix.
If it's still soft at 100%, press Ctrl+T (Cmd+T) on the layer and look at W and H in the options bar. On a placed layer (a Smart Object) those percentages are measured against the original image. Anything other than 100%, or a round 200% / 300%, means Photoshop scaled it. Then read on.
Why it happens
Dragging a file into a document, or File > Place Embedded / Place Linked, doesn't paste your pixels. It creates a Smart Object and fits it into the document, which can resample it in three ways:
- Resolution mismatch. A Smart Object keeps the image's physical size, in inches, not its pixel size. A sprite saved at 72 ppi placed into a 300 ppi document is enlarged by 300/72, that is to 416.67%. That's the number you'll see in W and H.
- Resize Image During Place. With this preference on (it is by default), an image bigger than the canvas is shrunk to fit. A sprite sheet larger than your document comes in scaled down.
- The interpolation method. Any resample uses Image Interpolation, which defaults to Bicubic Automatic. Bicubic is made for photos: it blends neighbouring pixels. On pixel art that blending is the blur.
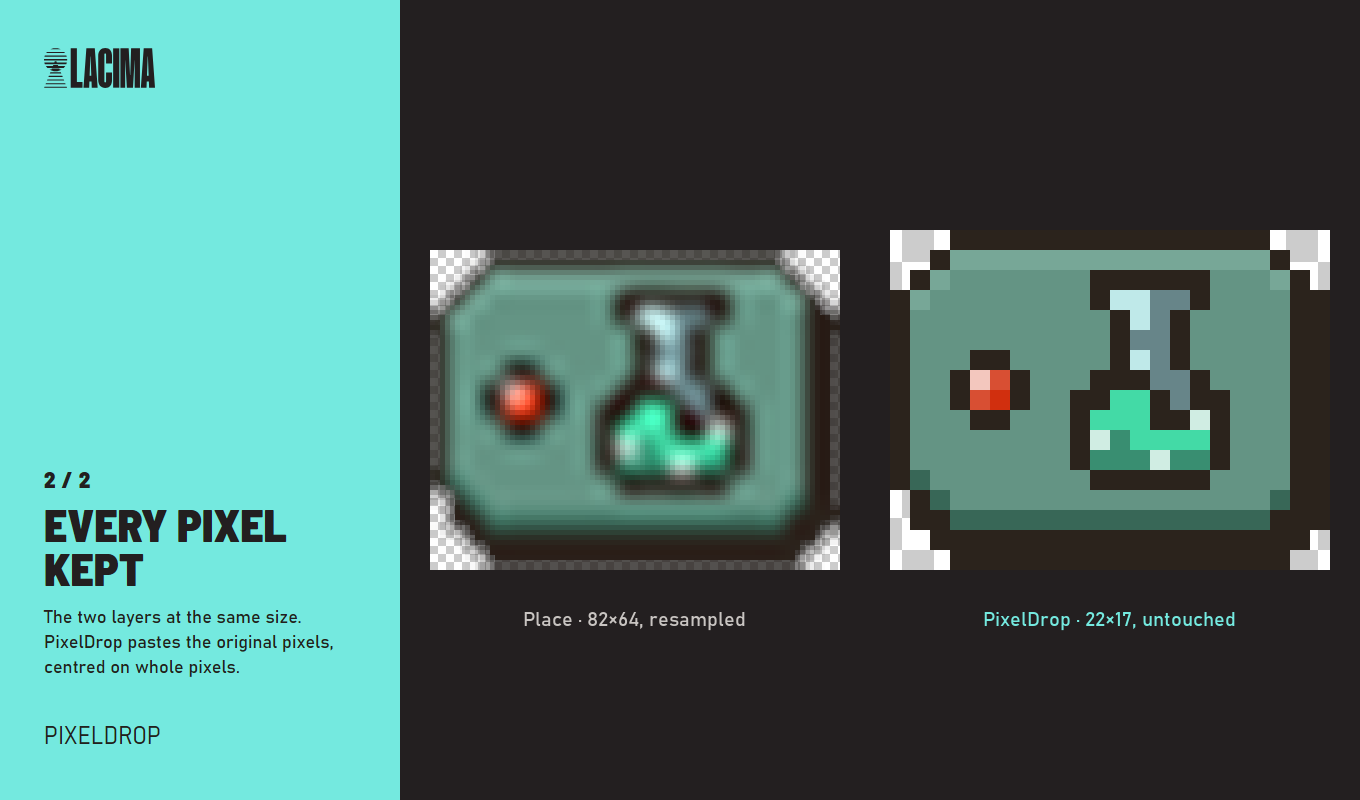
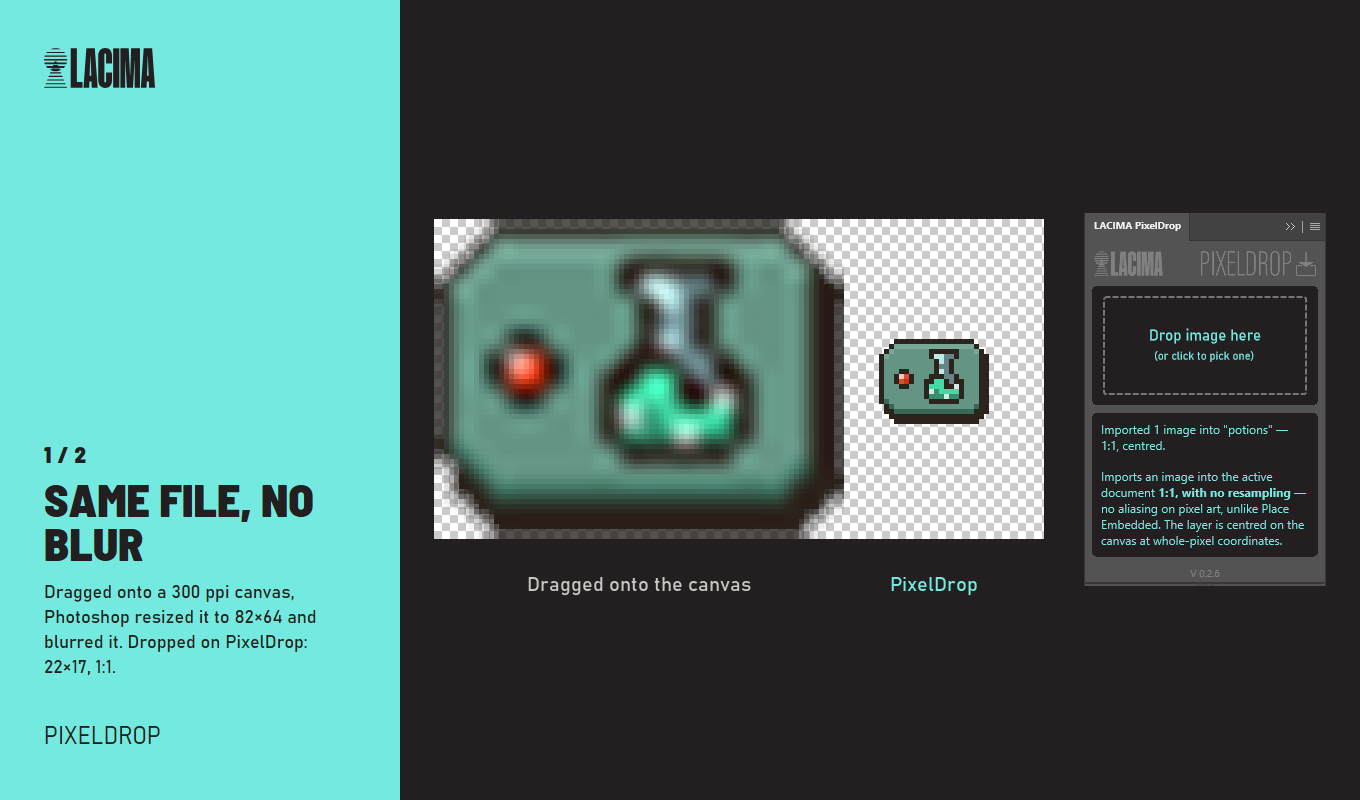
Causes 1 and 2 often stack. In our test, a 22×17 button dragged onto a 200×64 canvas at 300 ppi was first enlarged to about 92×71, taller than the canvas, then shrunk to fit: it landed at 82×64, soft.
Fix it: get the pixels in without resampling
Copy and paste. It's the old workaround and still the most reliable. Open the PNG on its own (File > Open), Select > All, Edit > Copy, switch to your document, Edit > Paste. Pasting creates a normal pixel layer at the image's own pixel size, whatever the resolution of either file. Dragging the layer from one document tab into the other with the Move tool does the same.
Or make Place behave. If you prefer placing (Smart Objects have their uses):
- Make both files the same resolution. In the sprite, Image > Image Size, untick Resample, set Resolution to your document's value, OK, save. Nothing about the pixels changes.
- Edit > Preferences > General (Photoshop > Settings > General on Mac): untick Resize Image During Place, and set Image Interpolation to Nearest Neighbor (preserve hard edges).
Fix a sprite that's already blurry
If the soft layer is a Smart Object, the original pixels are still inside it, so you can fix it without re-importing:
- Set Image Interpolation to Nearest Neighbor (step 2 above).
- Select the layer, press Ctrl+T, and type 100% in W and H (or 200%, 300%: any whole multiple).
- Press Enter. Photoshop renders it again from the original, this time with hard edges.
If the layer is already a normal pixel layer (rasterized), the blur is baked in. Delete it and bring the sprite in again by one of the methods above.
Scaling pixel art up, the right way
To make a sprite bigger in Photoshop, always scale by whole multiples: 200%, 300%, 400%. With Image > Image Size, set Resample to Nearest Neighbor (hard edges). At 150% even Nearest Neighbor has to make some pixels two wide and others one, and the art looks uneven.
Or with PixelDrop
PixelDrop is a free panel for Photoshop that does the copy-and-paste for you. Drag image files onto the panel and each one arrives as a raster layer at its original size, centred on whole-pixel coordinates. It doesn't resample anything: no Smart Object, no interpolation setting involved, no dialog. Several files at once work too.
- Open the document you're working in.
- Drag one or more PNGs onto the PixelDrop panel (on Photoshop 2023 to 2025, use the panel's button to pick the files instead: the result is the same).
- Your sprites are layers, pixel for pixel.
It's free, there's no licence key and you can use it in commercial work. You get it by email from the PixelDrop page.
Quick answers
Why is it fine when I open the file directly? Opening a file shows its pixels one to one. Only placing turns it into a Smart Object fitted to another document.
My document is 72 ppi and the sprite is 72 ppi, and it's still soft. Then the image was probably bigger than the canvas and Resize Image During Place shrank it. Check the W and H percentages with Ctrl+T.
Should I turn off "Always Create Smart Objects when Placing"? Then placing gives a pixel layer, but the image still goes through the same scaling and centring on the way in. It also takes away the way back: a blurry placed sprite is then a plain pixel layer and can't be recovered with the fix above, so you have to import it again. Copy and paste, or PixelDrop, avoids all of it.
The plug-in in this guide: PixelDrop.