Guides · 2026-10-03
Why Photoshop's Export As Crops Transparent Pixels (and How to Stop It)
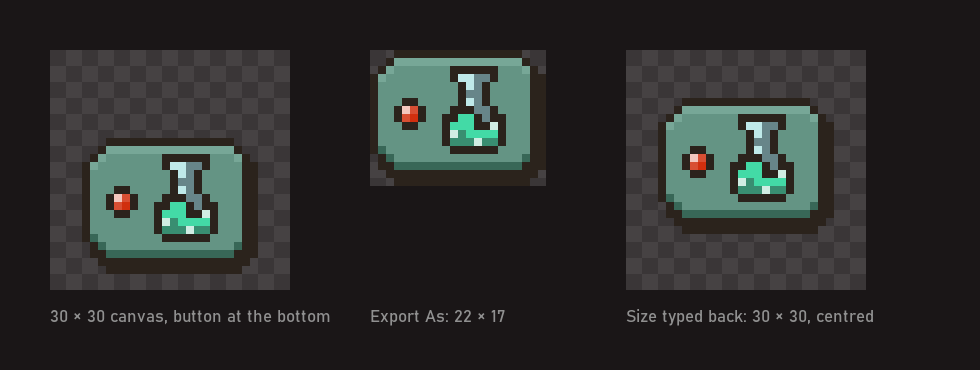
You have a 300×300 canvas with a shape in the bottom half. You right-click the layer, choose Export As, and the PNG comes out 300×150: the empty top half is gone. Type 300 back into the canvas height in the dialog and the shape ends up in the middle, not at the bottom where you put it.
It's one of the most-read Photoshop threads on Adobe Community: "Export without crop/trim?" has over 40,000 views, and it has been open since 2018. This guide explains what Photoshop is doing, which fixes still work today, and which popular ones quietly stopped working.
What's going on
Export As and Quick Export save the pixels of what you export, not the canvas around them. When you export a layer or a group, Photoshop measures the area that has visible pixels and saves only that. Fully transparent rows and columns at the edges are dropped.
It isn't only Export As. Copy and Paste of a layer and File > Place trim transparent borders in the same way, and so does Generate > Image Assets.
The canvas size field inside the Export As dialog doesn't put the space back where it was. It adds space around the trimmed image, centred.
Fix 1: Save a Copy (one image, full canvas)
If you need the whole document as one PNG, at canvas size, don't use Export at all.
- Hide the layers you don't want in the image.
- Choose File > Save a Copy (or Save As in older versions).
- Pick PNG as the format and save.
The file has exactly the canvas size, transparency included. File > Export > Save for Web (Legacy) with PNG-24 and Transparency on does the same, if you prefer that dialog.
This is the most reliable fix, but it's one image at a time: for twenty layers you hide and save twenty times.
Fix 2: Layer Comps to Files (many images, your names)
This one is less known and solves the hardest case: several layers or groups, each exported as one PNG at canvas size, with names you choose.
- Open Window > Layer Comps.
- Show only the first thing you want to export (a layer, or a whole group), hide the rest.
- Click Create New Layer Comp, tick Visibility, and give the comp the name you want for the file.
- Repeat for every image you need.
- Go to File > Export > Layer Comps to Files.
- Choose PNG-24 with Transparency, delete the File Name Prefix and untick Index, so the files are named after the comps.
- Run.
Every PNG comes out at canvas size, with everything in place, and a group exports as one image because the comp is just a visibility state. The setup takes a while the first time, but the comps stay in the PSD: next time you only press Run.
Fix 3: Layers to Files with Trim off
For many single layers, File > Export > Layers to Files with Trim Layers unticked keeps the full canvas. File names get a number in front and groups aren't merged. We cover it step by step in Export Photoshop layers as PNG without trimming.
Fixes that don't work any more (or shouldn't be used)
- The layer mask trick. For years the accepted answer was to add a full white layer mask to the layer or group before Export As: the mask covers the whole canvas, so nothing was trimmed. Users in the same thread report that it stopped working with Photoshop 22.5.1, and nobody there has reported it working again since. Don't build a workflow on it.
- The 1% corner pixels. Put a pixel at 1% opacity in two opposite corners and Export As keeps the full size. It works, but those pixels are in your file. As one user put it in the thread, optically invisible isn't mathematically invisible: an engine, a shader or an outline effect will see them.
- Typing the canvas size in Export As. Gives you the right dimensions, with the artwork centred. Only useful when centred is what you want.
Or with SpriteExporter
SpriteExporter is the plug-in for Photoshop we made after setting up layer comps one too many times for game UI and animation frames.
- Open the panel and choose Keep canvas size, or Trim to artwork when you do want small files.
- Choose each visible layer, or each top-level group merged into one PNG. Optionally, only the groups selected in the Layers panel.
- Pick a folder. Layer and group names become file names, with an optional prefix, at @1x or @2x.
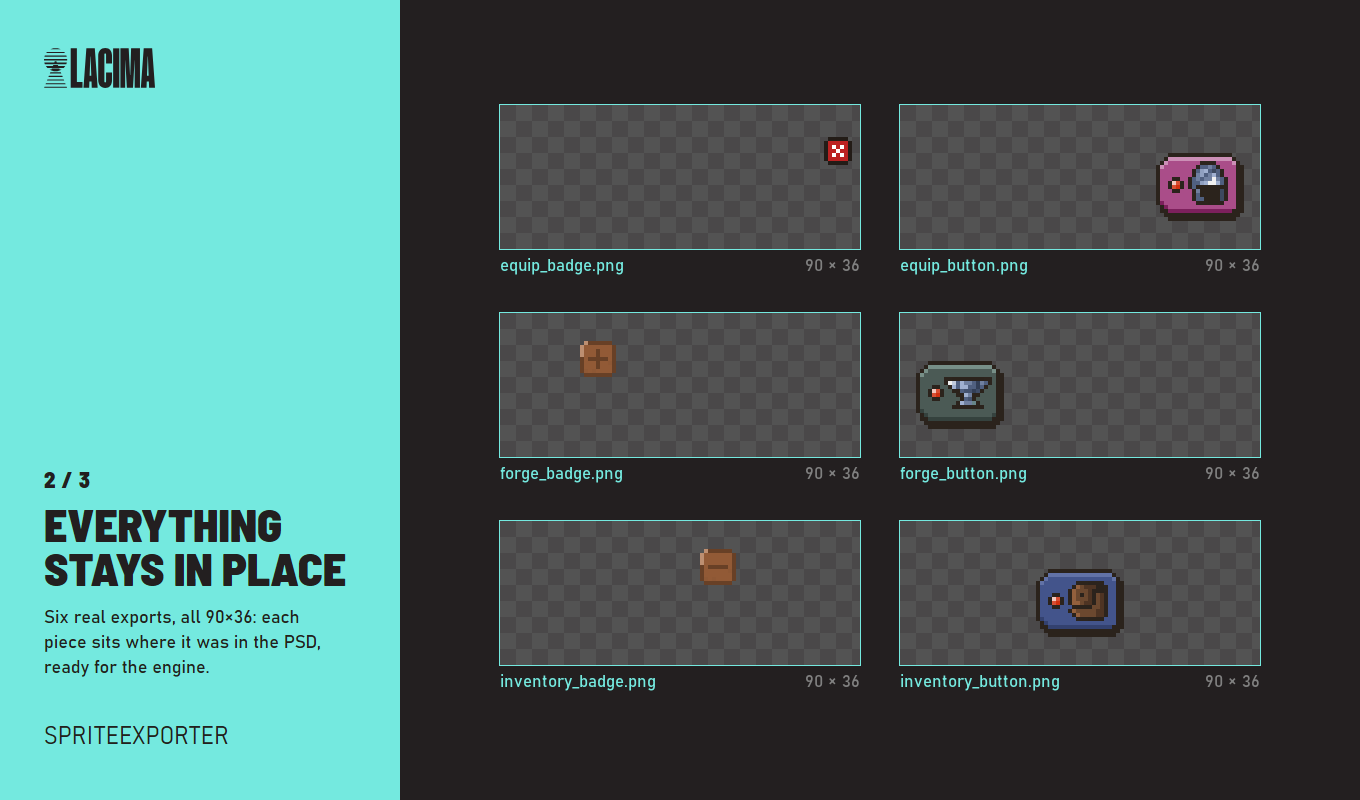
No comps to maintain, no numbers in front of the names, and your document is left exactly as it was. It's $9.74, for Photoshop 2023 (v24.0) and later, tested on Windows.
Quick answers
Why does Photoshop do this at all? For icons and web graphics, trimming is what you usually want. The trouble is there's no switch to turn it off in Export As.
Will Adobe add a checkbox? People have asked since at least 2018. Layers to Files has had a Trim Layers option for years; Export As still doesn't.
My placed image lost its transparent border. Same behaviour: Place and Paste trim transparent edges too. The workaround suggested by Community Experts is to give the source image a full-size background, place it, then hide that background inside the Smart Object or remove it with Blend If.
The plug-in in this guide: SpriteExporter.