Guides · 2026-10-02
How to 9-Slice Scale in Photoshop Without Distorting the Corners
You drew a panel, a button or a dialog frame. Now you need it wider, or taller, or at five different sizes. Press Ctrl+T, drag, and the corners turn into ovals and the border gets twice as thick on one side.
Game engines solved this a long time ago with 9-slice scaling (also called nine-slice, 9-patch or scale-9). Photoshop never did. Adobe has had a feature request for it open since 2012, and the usual answer in the forums is still "Photoshop doesn't do that".
This guide shows how to do it by hand with tools Photoshop already has, then a quicker way.
What 9-slice scaling actually does
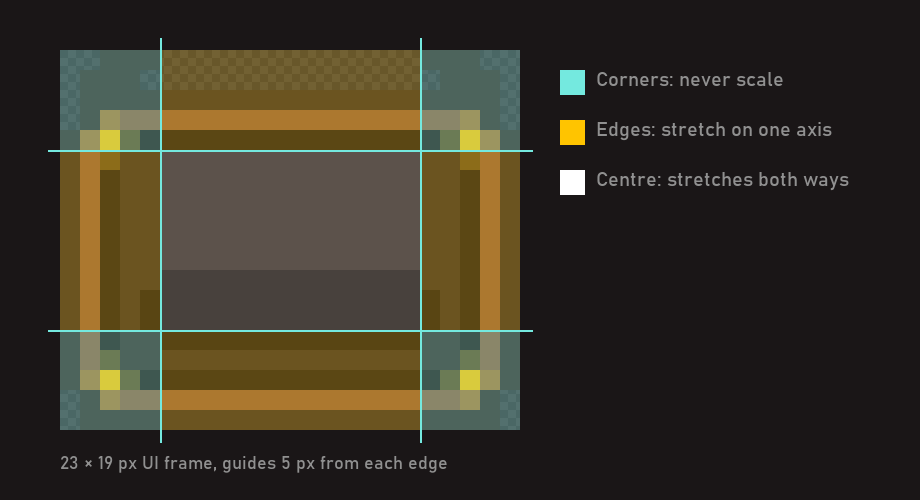
You draw four lines over the image, two vertical and two horizontal. They cut it into a 3×3 grid:
- the four corners never scale;
- the top and bottom edges stretch only horizontally;
- the left and right edges stretch only vertically;
- the centre stretches both ways.
The result: the frame gets bigger, the corners and the border thickness stay exactly as you drew them.
The manual way, step by step
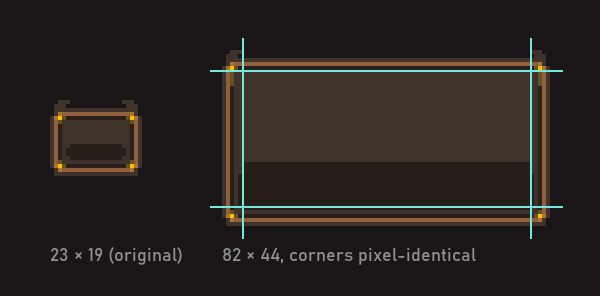
This works on any raster frame whose edges are uniform along their length (a plain border, a gradient across the border, a bevel). The example takes a 23×19 px frame with 5 px borders to 82×44 px.
- Pixel art only: switch off smoothing. Go to Edit > Preferences > General (Photoshop > Settings > General on a Mac) and set Image Interpolation to Nearest Neighbor (preserve hard edges). For painted or vector-style art, keep Bicubic.
- Put the frame alone on a layer. It must be a normal pixel layer, not a Smart Object, or Free Transform will scale it as one piece. Hide a copy of the original: you'll want it for the next size.
- Mark the borders with guides. View > Guides > New Guide Layout, tick Margin and type the border thickness on all four sides (5 px here). Now you can see where the corners end.
- Make room. Image > Canvas Size, set the new width and height (82×44), and click the top-left anchor so the frame stays in the corner.
- Move the right side out. With the Rectangular Marquee, select from the right guide to the right edge of the frame, top to bottom. Switch to the Move tool and push the selection right by the difference in width: 82 − 23 = 59 px. Shift+Right Arrow moves 10 px at a time, Right Arrow moves 1 px.
- Stretch the middle column. Select the strip between the left guide and the old position of the right guide, full height. Ctrl+T, drag the right handle until it touches the piece you just moved, press Enter. Only the top edge, bottom edge and centre have changed width. The corners haven't moved.
- Do the same vertically. Select from the bottom guide to the bottom of the frame and move it down by 44 − 19 = 25 px. Then select the middle row, Ctrl+T, and stretch it down to meet the bottom piece.
- Check the seams. Zoom to 400% or more and look at the four places where you stretched. If you see a one-pixel gap or overlap, undo and nudge with the arrow keys instead of dragging.
Where the manual way falls short
- It's destructive. The stretched pixels are baked in. To get another size, start again from a copy of the original, so keep one hidden.
- Every size is eight steps. A set of buttons at five sizes is forty steps, and one mistake in a drag shows up as a seam.
- Patterned edges smear. If the top edge has rivets or a repeating motif, stretching it turns the motif into long blobs. Engines can tile edges instead of stretching them. By hand, you'd copy the motif across instead.
What about Illustrator?
Illustrator has real 9-slice scaling, but only for symbols. Turn a vector frame into a symbol, tick Enable Guides for 9-Slice Scaling in Symbol Options, and scale freely. That's a good answer if your UI is vector. If it's pixel art or painted in Photoshop, moving it to Illustrator and back usually costs you more than the steps above.
Or with NineSlicer
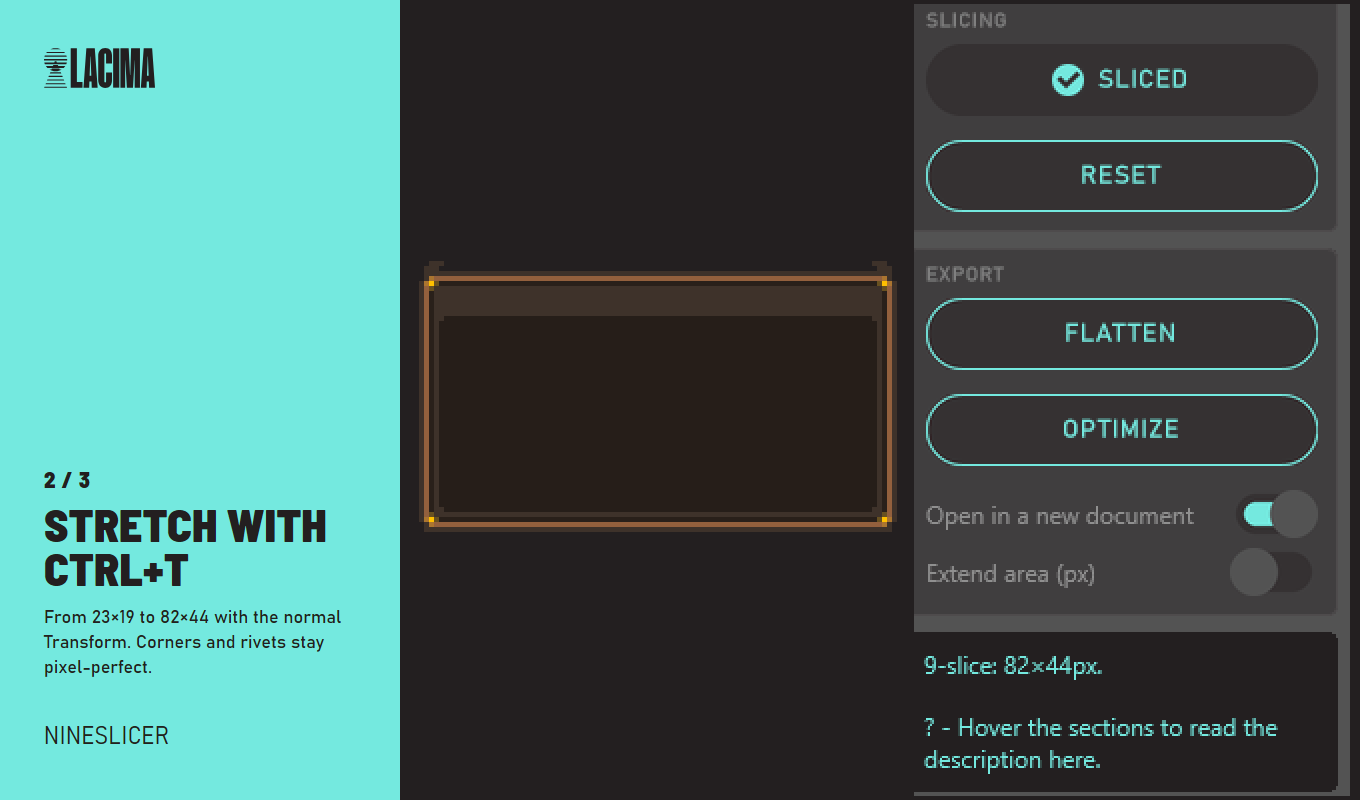
NineSlicer is a plug-in for Photoshop we made for exactly this, because we were doing the steps above by hand for every UI frame. It turns the native Free Transform into a 9-slice resize.
- Slice. Drop two vertical and two horizontal guides on the edges of the corners, select the layer, click Slice. The guides disappear and the original is kept hidden as the source.
- Resize. Ctrl+T, stretch to any size, Enter. NineSlicer rebuilds the layer from the original pixels: corners fixed, edges stretched on one axis, centre filled.
- Repeat. Every resize starts again from the original, so you can go bigger, smaller, wider, taller as often as you like. You can have several sliced layers in one document, each independent.
- Render or export. Render flattens a finished layer into a normal one. Build export-ready sprite makes the smallest version your engine can stretch, with the four border values for Unity, Godot, Unreal or GameMaker (more on that in Make a 9-slice sprite for your game engine).
It's $14.99, works in Photoshop 2023 (v24.0) and later, and has been tested on Windows (macOS not yet: if it doesn't work on your Mac, you get a full refund within 14 days).
A free tool worth knowing about: UI 9-Slicer by Scott Woodhams cuts a sprite into slices for export. It doesn't resize anything inside Photoshop, so it solves a different step.
Quick answers
Is there a 9-slice option hidden somewhere in Photoshop? No. The Slice tool is for cutting web layouts into images, and Content-Aware Scale protects areas by guessing, not by keeping exact corners.
Does it work on Smart Objects? Not by hand: a Smart Object always scales as one image. Rasterize a copy first.
What sizes should the borders be? As thick as the part that must not deform: the rounded corner, the bevel, the outline. Everything inside can stretch.
The plug-in in this guide: NineSlicer.