Guides · 2026-10-02
Make a 9-Slice Sprite in Photoshop for Unity, Godot, Unreal and GameMaker
Every engine can stretch a UI frame without deforming its corners: Unity calls it 9-slicing, Godot has the NinePatchRect, Unreal has Box brushes, GameMaker has Nine Slice. The engine side is well documented. What the tutorials skip is the Photoshop side: how big should the image be, and what numbers go in the border fields?
This guide answers both. Short version: ship the sprite at its smallest stretchable size, and the border values are the size of the corners.
Why the sprite should be small
A 9-slice sprite doesn't need to ship at the size you drew it. Everything between the borders is going to be stretched by the engine anyway, so if your panel is 300×200 with 12 px borders, the 276 px in the middle of each edge are just a longer copy of the same pixels. They cost texture memory and atlas space and add nothing.
The smallest useful version keeps the four corners at full size and collapses the stretchable middle to 1 px.
Example: a 23×19 px frame with 5 px borders on every side becomes 5 + 1 + 5 = 11 px wide and 11 px tall.
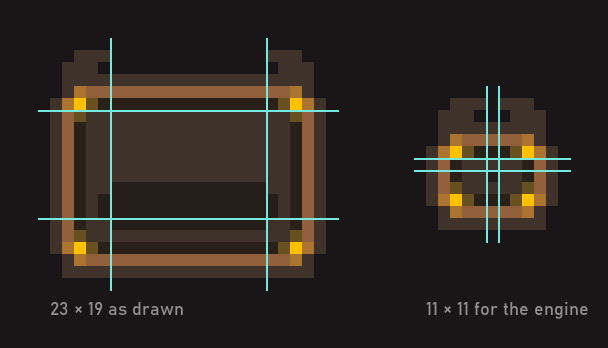
1 px or more?
- 1 px is enough if the texture is drawn with point / nearest filtering and no mipmaps, which is the usual setup for pixel art.
- Use 2 to 4 px if the engine uses bilinear filtering or mipmaps. Filtering samples neighbouring pixels, and with only 1 px in the middle the corner colours bleed into the stretched area. A few pixels of plain edge give it room.
The manual way in Photoshop
- **Pixel art: set Image Interpolation to Nearest Neighbor** in Edit > Preferences > General.
- Mark the borders. View > Guides > New Guide Layout, tick Margin, type the border thickness on each side (5 px in the example). Write the four numbers down: they are your border values.
- Collapse the width. With the Rectangular Marquee, select the vertical strip between the left and right guides, full height. Ctrl+T and drag the right handle left until the strip is 1 px wide (or 2–4, see above). Check the width in the Options bar, then press Enter.
- Close the gap. Select everything to the right of the strip, from the old right guide to the edge, and move it left with the Move tool until it touches the strip. Arrow keys move 1 px at a time.
- Collapse the height the same way: shrink the middle row to 1 px, then move the bottom part up.
- Crop. Image > Trim, based on Transparent Pixels. You should end up at exactly left + middle + right by top + middle + bottom (11×11 here).
- Save a Copy as PNG. Keep the big original PSD: if you redraw the frame, start from it again.
The catch is the same as any manual pixel work: one wrong drag gives a frame that's 1 px off, and the engine will show it as a seam. Zoom in and check the final size before you export.
Typing the border values into each engine
Use the four numbers from step 2. They don't change when you collapse the middle, because the corners keep their size.
Unity
- Select the PNG, set Texture Type to Sprite (2D and UI). For pixel art set Filter Mode to Point (no filter) and Compression to None.
- Open the Sprite Editor and type the values into the Border fields (L, T, R, B), then Apply.
- On a UI Image set Image Type to Sliced. On a SpriteRenderer set Draw Mode to Sliced (the sprite's Mesh Type must be Full Rect).
Godot 4
- Add a NinePatchRect node and assign the texture.
- Under Patch Margin, set Left, Top, Right, Bottom.
- Axis Stretch chooses whether edges stretch or tile. For pixel art, set the node's Texture > Filter to Nearest.
Unreal Engine (UMG)
- In the Image widget's Brush, set Draw As to Box.
- Margin is a fraction of the texture size, not pixels. Divide each border by the texture width (left/right) or height (top/bottom). 5 px on an 11 px texture is 5 ÷ 11 = 0.4545.
GameMaker
- Open the sprite, enable Nine Slice.
- Set Left, Top, Right, Bottom to your four values. Each section can be set to stretch or repeat.
Or with NineSlicer
NineSlicer is our plug-in for Photoshop that does 9-slice scaling. Its last step does the collapse and the arithmetic for you.
- Slice the layer with four guides, as you would for resizing (see How to 9-slice scale in Photoshop).
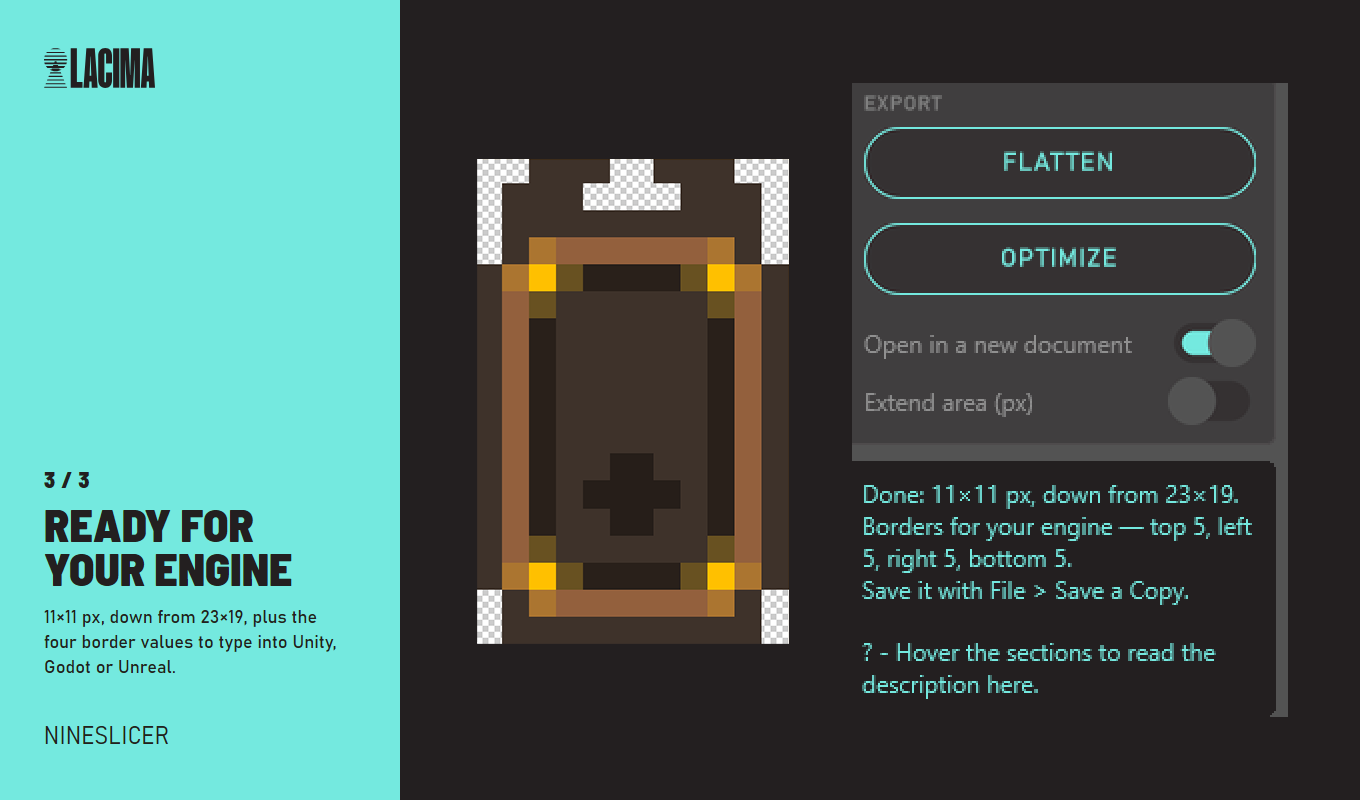
- Click Build export-ready sprite.
- Choose the size of the stretchable middle: 1 px, or 2–4 px if your engine filters or mipmaps.
- Choose where it goes: a new document or the one you're working in.
- You get the sprite at its minimum size plus the four border values, ready to type into Unity, Godot, Unreal or GameMaker.
It's $14.99, for Photoshop 2023 (v24.0) and later, tested on Windows (macOS not yet: full refund within 14 days if it doesn't work on your Mac). The same slice also lets you resize the frame inside Photoshop for mockups, so you design at real sizes and ship the small one.
Quick answers
My sliced sprite shows a thin line in the middle. Usually filtering: go from 1 px to 2–4 px in the middle, or switch the texture to point filtering. Also check the sprite isn't packed in an atlas without padding.
Can the four borders be different? Yes. A tab with a thick top and thin sides is normal. Measure each side separately.
Does the engine stretch or tile the edges? Both are possible in Unity, Godot and GameMaker. Stretch suits plain borders and gradients; tile suits patterns. With a 1 px middle, use stretch.
The plug-in in this guide: NineSlicer.